- Import from Project — In the Open dialog box, browse the network or your PC and select the project file to import. Then click Open. The Importing dialog box comes into view.
- Import from Catalog File — In the Open dialog box, browse the network or your PC and select the catalog file to import. Then click Open. The Importing dialog box comes into view.
NOTE: For information about how the Importing dialog box organizes tools that it imports, click Figure: Importing Tools from a Project File and Figure: Importing Tools from a Catalog File.
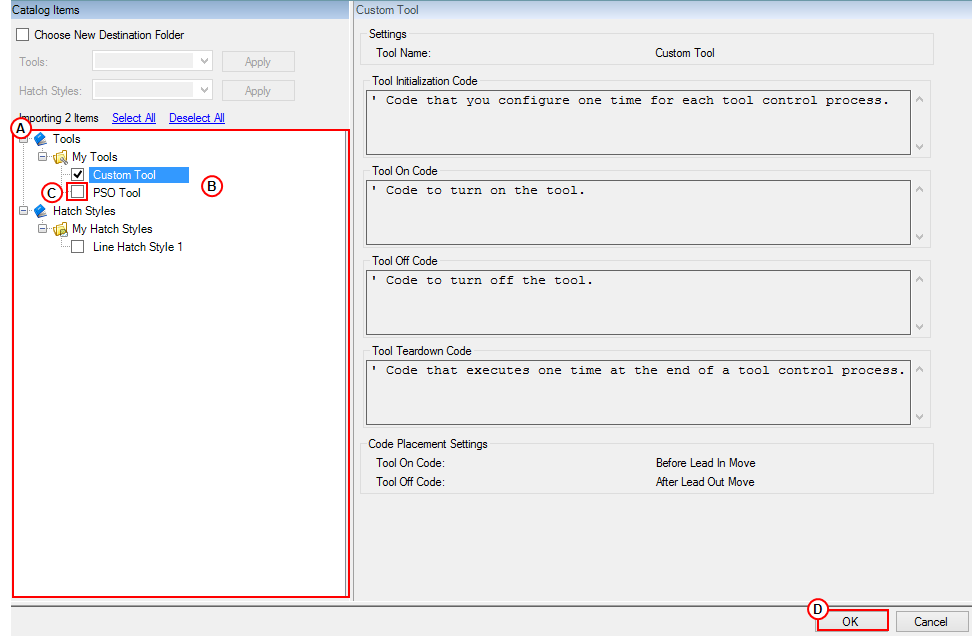
Table: Importing Tools from a Project File
| Figure Label | Name | Description |
|---|---|---|
|
|
Importing Catalog Items section. |
Shows the tools in their folders based on the type of file from which you import them. |
|
|
Import a project file. |
If you import tools from a project file, by default the Importing dialog box puts these tools in the My Tools folder. |
|
|
Clear a selection. |
You can clear the selection for a tool that you do not want to import. |
|
|
Click OK. |
When you click OK, the Importing dialog box imports the tools into your tool catalog. By default, it puts the tools in the same folders that you see in the Importing Catalog Items section of this dialog box. |


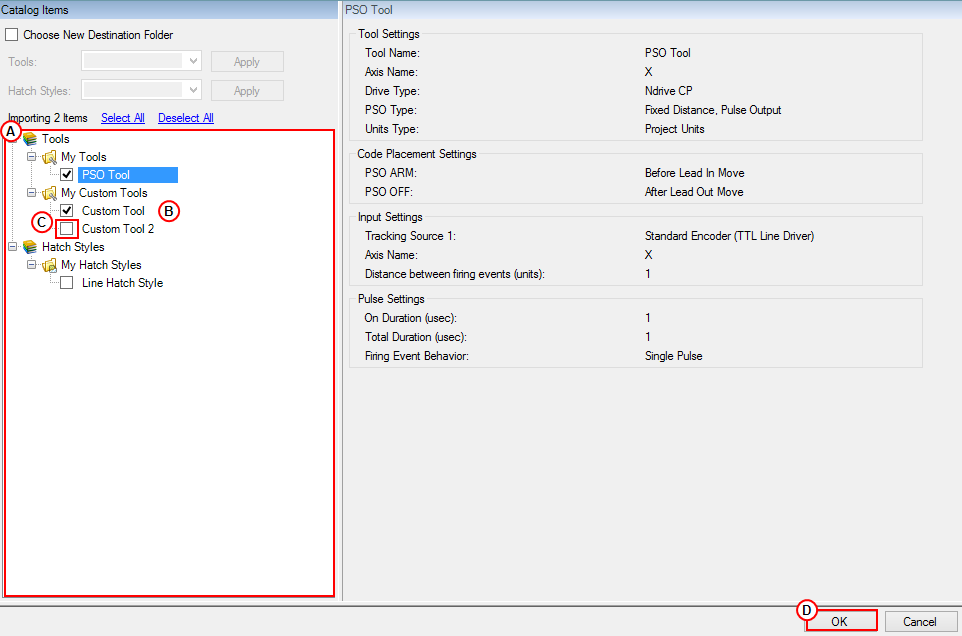
Table: Importing Tools from a Catalog File
| Figure Label | Name | Description |
|---|---|---|
|
|
Importing Catalog Items section. |
Shows the tools in their folders based on the type of file from which you import them. |
|
|
Import a catalog file. |
If you import tools from a catalog file, by default the Importing dialog box keeps these tools in the folders in which they were initially specified in the catalog file. For example, there are tools in the My Tools folder and the My Custom Tools folder. |
|
|
Clear a selection. |
You can clear the selection for a tool that you do not want to import. |
|
|
Click OK. |
When you click OK, the Importing dialog box imports the tools into your tool catalog. By default, it puts the tools in the same folders that you see in the Importing Catalog Items section of this dialog box. |
NOTE: If a version conflict occurs while you are importing tools, the Importing dialog box shows a drop-down list adjacent to each tool that contains a version conflict. Refer to Resolve Version Conflicts to correct this problem. Then continue with the To Import Tools into the Catalog Manager procedure.
- In the Catalog Items section of the Importing dialog box, select Choose New Destination Folder.
- You can use the drop-down list to select an existing folder from your Tool Catalog or you can type a new folder name.
- Click Apply. The Importing dialog box shows the new folder or existing folder to which it imports the tools.